
Step 3: Peel Away the Tinting Film
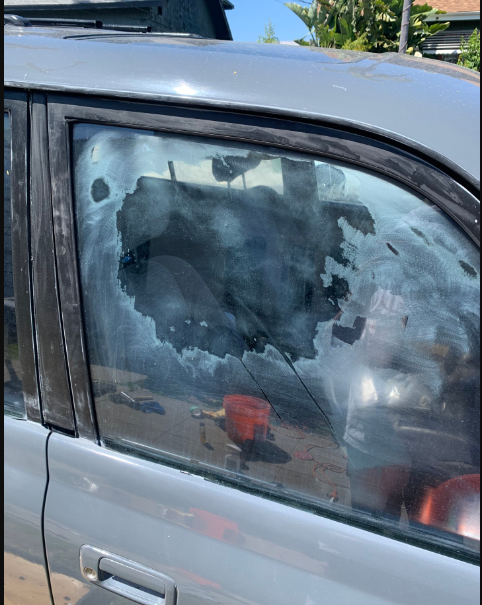
Once the tinting film is heated, use a razor blade or scraper to peel away the film. Start at one corner of the film and use the razor blade or scraper to lift the film away from the window. It's important to work slowly and carefully to avoid damaging the window or leaving any adhesive residue behind. If the film is stubborn, reapply heat and continue the peeling process. Step 4: Remove the Adhesive Residue After you have removed the tinting film, you may notice that there is adhesive residue left behind. To remove the residue, spray the soapy water onto the window and use a razor blade or scraper to gently scrape away the adhesive. Be sure to use a light touch to avoid scratching the window. Alternatively, you can use a commercial adhesive remover specifically designed for automotive use. Follow the product instructions carefully for the best results. Step 5: Clean the Window Once you have removed all of the tinting film and adhesive residue, it's time to clean the window. Use a cleaning cloth or paper towels to wipe down the window. Be sure to use a cleaner that is safe for use on car windows and avoid using any abrasive materials that could scratch the glass. You can use a mixture of water and mild detergent or a commercial glass cleaner for a streak-free finish. In conclusion, removing window tinting film from your car may seem like a daunting task, but with the right tools and techniques, it can be done quickly and easily. By following these step-by-step instructions, you can safely and effectively remove the tinting film from your car windows, leaving them looking clean and clear. However, if you're unsure about the process or prefer to have professionals handle the task, it's always best to consult a reputable window tinting service. They have the expertise and experience to remove the tinting film efficiently and without causing any damage to your car windows. Contact us today or call us now for expert advice and assistance with your window tinting needs. We are dedicated to providing top-notch services and helping you achieve the desired results for your car.
0 Comments
Leave a Reply. |
Archives
October 2023
Categories |
 RSS Feed
FOR REFERRAL CONTACT US: (720) 418 - 8191Monday 6:00 AM - 9:00 PM
Tuesday 6:00 AM - 9:00 PM Wednesday 6:00 AM - 9:00 PM Thursday 6:00 AM - 9:00 PM Friday 6:00 AM - 9:00 PM Saturday 6:00 AM - 9:00 PM |
OUR VIRTUAL OFFICE:Denver, CO, US 80222 |
Colorado Window Tinting is a referral service to pair you with the top contractors in CO, the university, and surrounding areas.
Colorado Window Tinting© 2024